I recently received an e-mail from a man called Karl Hauffe with the following offer"Hi Robert:
Would you be interested in some photos taken inside the Memphis Belle (the real one) before its "restoration". In these it is possible to see remnants of the original fabric and paint, plus where various bits and pieces of equipment were located. The airplane was in rough shape, but nothing had been painted over. I took them in 1979 and was looking for detail. I think other modelers would find them useful. Let me know. /Karl Hauffe"
Well, for sure! Those are great pictures of original wear and tare with very interesting captions. Thank you, Karl for taking your time and sharing this with us.
For those who want to know more about this specific bird, have a look at Home of the Memphis Belle.
| Memphis Belle Photos; Taken in fall 1979
At the time these pictures were taken, the airplane was sitting at the
Memphis airport prior to any restoration work. As can be seen, the aircraft
had been badly vandalized over the years. In my comments are included many
guesses, but they are educated guesses. Ive been studying these photos
for twenty years now and, with the help of the blueprints and manuals,
Ive been able to figure out a lot about this aircraft. No doubt, some
of my guesses are wrong. The developer did not seem to know how to allow
for the color of the flash that leaves a peculiar blue tint to some of
the pictures.
|
|
 |
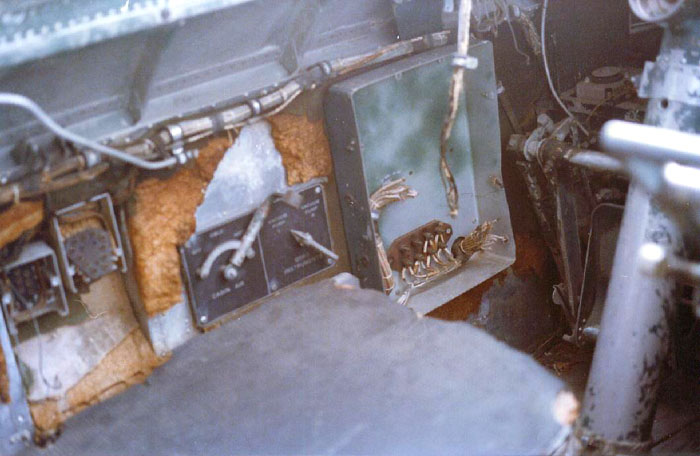
This is the remains of the bombardiers control panel. The handle that controlled the switch for operating the bomb bay doors remains although the knob is gone, as is the lever that controlled the bomb racks. It was connected to the rod just under the panel frame. The cover is bent out towards the viewer. The aluminum box on the lower left corner of the panel was most likely for a switch that controlled nose fusing. This is another mod and the nose fusing solenoids show up in a photo in the bomb bay. It was standardized on later aircraft. There is a small storage compartment on top of the panel. The pilots manual is mine. You can also see that the nose was Bondo-ed rather heavily. |
 |
This one is the view of the left upper side of the navigators compartment. The box in the lower right held the radio compass relay and wiring. There was a map case mounted above it. On later aircraft, the map case was deleted and a radio compass indicator was installed here. On the Belle, the indicator was in the navigators table. Or it should have been anyway. The small box in the bottom center had a light. You can see the back of the center and right instrument panels. The pilots panel is missing. |
 |
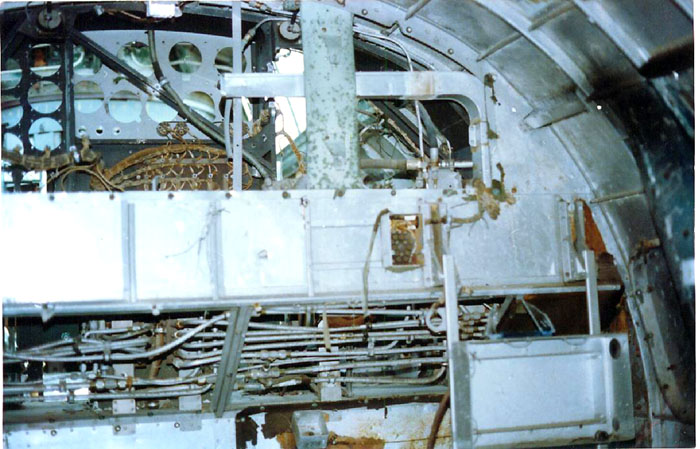
This is the main fuse panel, located on the bulkhead between the top turret area and the bomb bay. You can make out a piece of the original fabric in the upper right. Next to the fabric hanging down is a box for another light, and the next box aft held an intercom. The large green brackets were for the oxygen bottles. |
 |
The main instrument panel. Utter devastation. The bracket on top of the panel was for a remote reading compass indicator. This can be made out in the book MEMPHIS BELLE HOME AT LAST, by Menno Duerksen. The pilots panel, the seats, and the control wheels are all gone. Very sad. Unfortunately, when they restored the Belle, they installed a later panel for the pilot. |
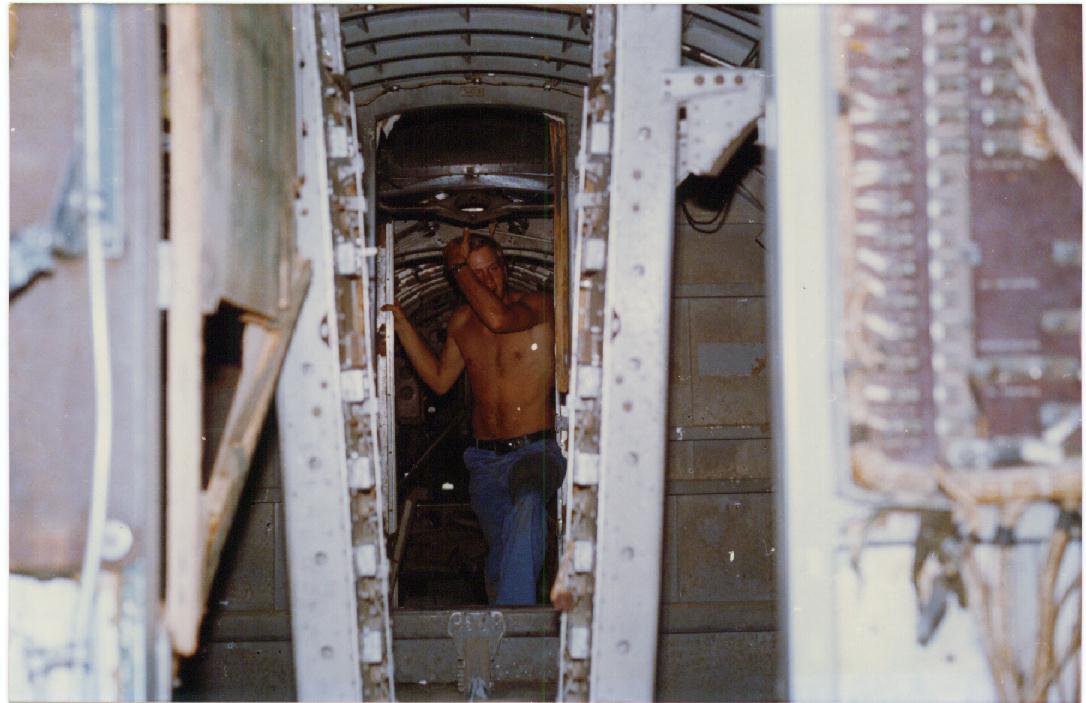 |
Although this picture is primarily of my buddy Randy sweating his behind off (it was extremely warm and humid that day), you can see the remains of the door between the top turret area and bomb bay as well as the radio operator gun mount. The narrowness of the walkway between the bomb racks is also readily apparent. |
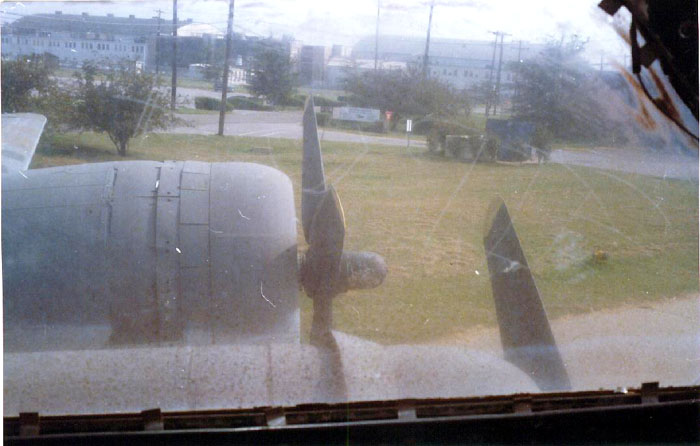 |
View from the pilots seat. The original window is gone of course and had been replaced with a thin piece of cheap plastic. |
 |
This picture is just above the previous one. The armor plate is on the bomb bay side of the bulkhead where the main fuse panel is located in the earlier picture. |
 |
Strobe did not go off for this one, but I thought the over all darkness reflected my feeling about the condition of the airplane. Im not usually so melodramatic, but for some reason this one just struck me that way. |
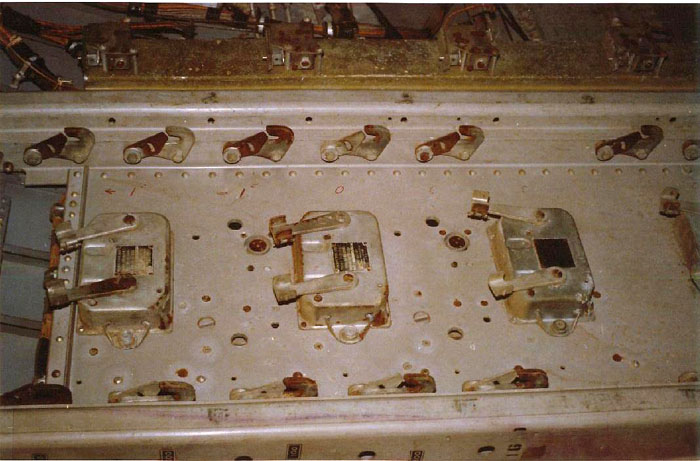 |
This is the left outboard bomb rack. It shows the hooks for the bomb shackles and the Mallory bomb release units as well as the nose fusing solenoids again. |
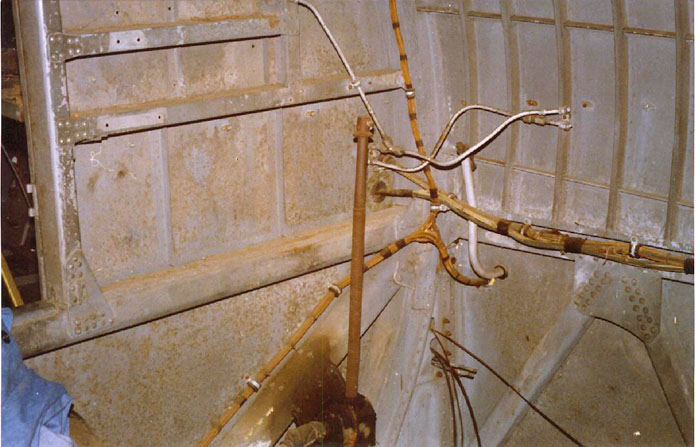 |
This is the left aft end of the bomb bay (below). This picture was literally a shot in the dark. I had no idea what I was shooting. The rusted mechanism is the bomb bay door jackscrew and the unpainted area on the bulkhead formers was where the hand cranked fuel pump was mounted. You can also make out part of the radio operators table on the other side of the bulkhead. |
 |
View aft from between the bomb racks. Too dark, but you can see the radio operators gun mount again, the support for the ball turret and the ammunition boxes rigged up for the waist guns. |
 |
Radio operators table. Once again, the destruction of vandals is horribly evident. The black unit with the red dot was an impact operated destruct switch for the IFF unit. The control for the IFF was mounted on the bracket just to its right. The light brown crap that is on the table (and shows up in other photos as well) is what is left of the soundproofing material. This was under the fabric lining in the radio room, cockpit, and nose areas. The material on the sidewalls here is unusual. It is not per the factory drawings, but in the video this area is extremely dark. Possibly this was installed prior to combat for some unknown reason. It is unlikely that it would have been installed when the airplane was used for training. Hard to say at this late date. |
 |
The waist gunners area looking aft. The ammo boxes are tail gun boxes mounted on a steel angle iron frame. For some reason, these were removed during restoration. |
 |
This is the control handle for the top turret. Not in focus, however. The silver items in the background are the ammunition feed chutes. |
 |
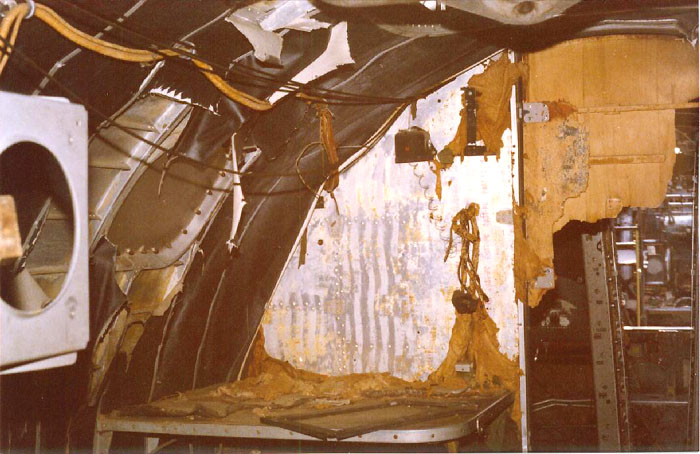
The right side of the cockpit. You can see some more of the fabric covering over the insulation. Also of note are the suit heater and (to its upper left) the bracket for the early style of oxygen regulator (type A-9). The intercooler stand is in the lower center. On the right side of the photo you can just make out the recess for the copilots interphone and filter boxes. This shows up better in the next shot. The valve in the panel was for the engine fire extinguisher. Just below it is the parking brake handle. |
 |
The pilots side wall. At the aft end is the recess for the interphone and filter boxes, with the controls for cabin heat and vacuum selection just forward. The remains of the pilots switch box is at the forward end and just above it is the oxygen regulator bracket. |
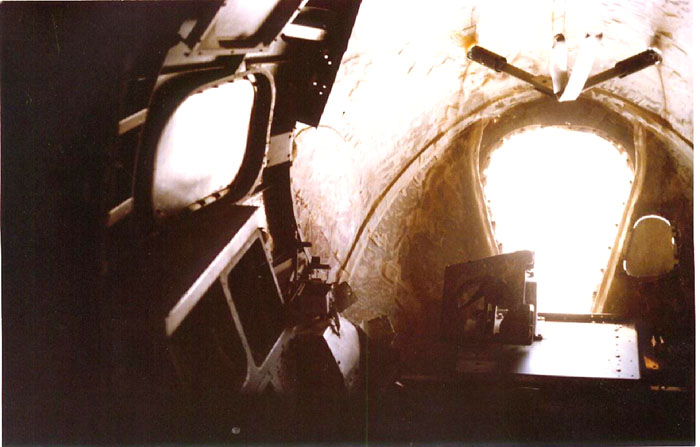 |
Another gloomy shot. This was taken through the pilots instrument panel. Note that the windows were covered with metal and made it very dark throughout the airplane (except the cockpit). Just above the window frame is a box that had a glass cover at one time. This was the bomb data card holder. This was a reference item for the bombardier when setting up his intervalometer and bombsight. The platform in the center of the nose shows up and you can just barely make out the bombsight support itself. |
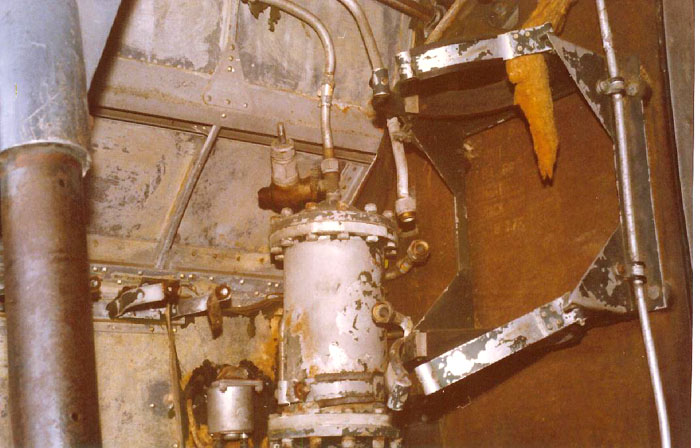 |
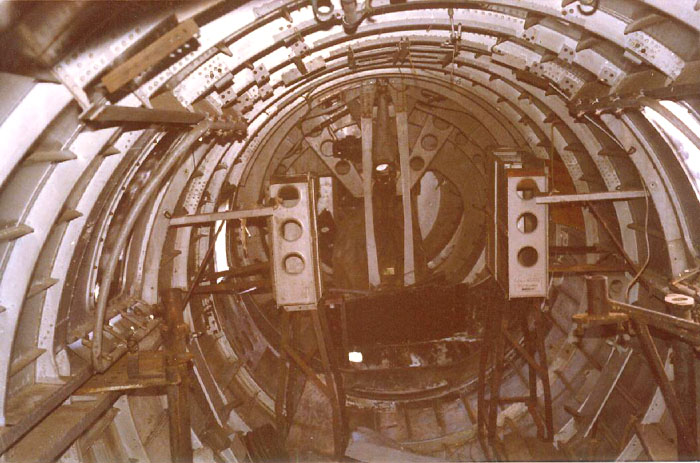
This is the right aft side of the top turret area. The green bracket on the armor plate held the hydraulic reservoir. The cylindrical unit remaining was the hydraulic accumulator and the brackets on the sidewall were for thermos bottles. In case Ive confused you, on the other side of the armor plate is the bomb bay. The tube on the left of the picture is part of the top turret. |
 |
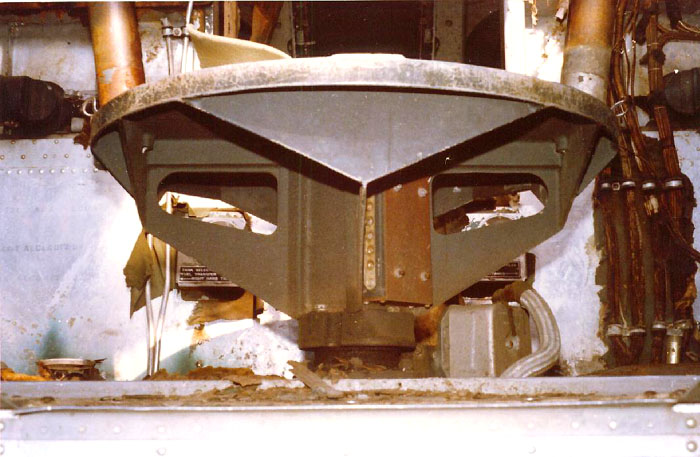
This is another view of the top turret. The gunner stood in the V shaped area. |
 |
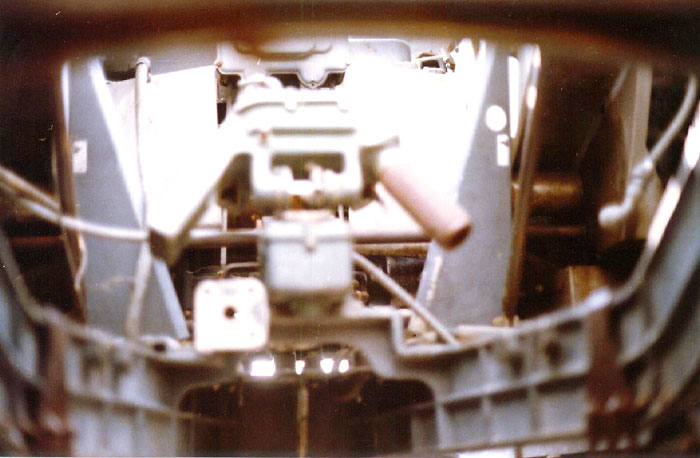
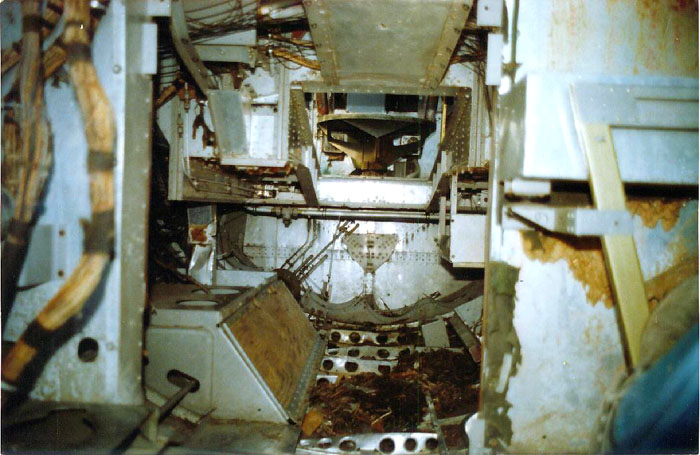
The base of the top turret. On the bulkhead behind it, you can see the controls for the fuel cross feed. |
 |
The view is forward from the entrance to the nose. The bombsight mount platform and the bombsight support are visible as well as the bomber suit heater and his hot air outlet. The former with the two lightening holes in the lower right corner is original (it protected the heat duct running down the right side), but the solid piece running to the left side is a mod of some sort. Probably had a piece of flooring to extend the bombardiers floor. I guess it was put in when the original seat was removed. The Belle came out of the factory with a bucket type seat that rode up and down on rails that went from the floor to the ceiling of the compartment. Ive only seen this seat in factory photos and drawings; never in combat shots. It was probably considered too awkward to get around in an emergency. The angle iron assembly on the right forward side was probably to hold an ammo box for the right nose gun. As you can see, the bombardiers floor was plywood, while the navigators was aluminum. |
 |
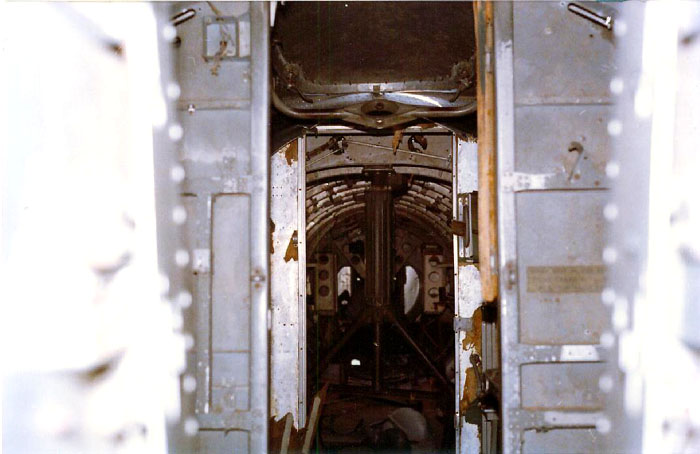
This is looking through the entrance to the nose compartment aft under the cockpit area. On the left is a wooden panel that covers part of the bomb release mechanism and in the background are brackets for oxygen bottles. |
 |
This view is looking in the bombardier/navigator station with the nose removed from the airplane. On the right is the bombers panel. The aluminum shelf that runs towards the back is a cover for the bomb rack linkage. The channel on the aft bulkhead supported the navigators table (the front support is gone). On the left is a bracket made from angle iron which I would guess held an ammo box. The wooden box on the aft left is unidentified. It is not the bombsight stowage box. Above it you can see the structure which was for stowage of .30 caliber ammo boxes (as from the factory). |